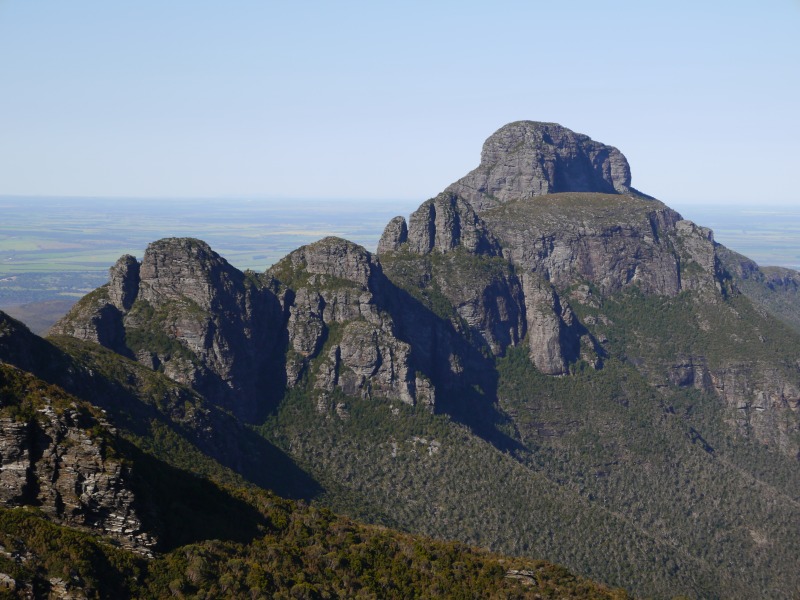
This is a remote, tough and unmarked route that traverses the Stirling Range Ridge. The route stays high around the 1,000 metres mark, and can be subject to fog, heavy rain and wind, and the very occasional snowfall. Also there is no reliable water on the route, and you are constantly scrambling up and down. If that sounds like the best hiking adventure you can get in Western Australia to you, then please continue reading. If not, maybe you should stick to shorter, easier day hikes like climbing Talyberlup peak.
This hike can be done as either a 3 day traverse (add a 5 km walk from the east park boundary gate) if you can use two cars, or want to pay for a shuttle from the Stirling Range Retreat, or a four days loop (can be done in 3 days with one long last day), this adds a 12 km walk on the fire break. The boundary track runs 200 metres parallel to the fire trail and a bit nicer. But this is still a long slog.
The track from the trailhead sign to the Bluff Knoll car park is approximately 20 km long and takes 3 days to most parties. The road from Bluff Knoll carpark adds 8 km if you can’t hitchhike from there (but usually hitchhiking is easy enough on that tourist road). Elevation gain is around 2000m, so that’s about 650 metres every day.
If you do the longest option (circuit) and walk along the Bluff Knoll route, that’s a 40 km walk. If you manage to have two cars or get a shuttle to the Eastern park boundary gate, and hitchike that’s a minimum of 25 km.
Some advice
- Wear long pants and sleeves because of the very “friendly” vegetation, carry rainproof gear and a tent. And warm clothes for the cold nights. Gloves are recommended for the Southern traverse of Pyungoorup or you might end with numerous cuts from the aptly named “sword grass”.
- Track type: this is an unmarked and unsigned route, though the track is easy to follow most of the way. Numerous erroneous tracks at some places, easy to get lost, you must have a GPS with the trace or come with someone who knows the place. Well the track isn’t exactly unmarked as we counted 4 markers on the whole way, but still these won’t help you much.
- There is no reliable water on the track so you need to carry all your water. We took 6 litres each as it wasn’t too hot, but you may need more, expect 3 litres per day at least in warm conditions. There is a water tank at some point, but it was unreliable, and the rangers usually don’t know its condition, so you shouldn’t rely on it.
- Difficulty: this is tough hike, with quite some steep scrambling on the way, but no rock climbing or pack hauling should be necessary. Navigation is hard around Ellen Peak and the Arrows.
Public transport
There is none of that. Closest bus stop is Mount Barker.
You could cycle there though. The good news is that the bus accepts bikes, and that the ride to the start of the hike is wonderful on nice gravel roads, it is 90 km from Mount Barker taking the Stirling Range Scenic Drive, which I highly recommend. Apart from that, hitchhiking may work, but it would be hard.
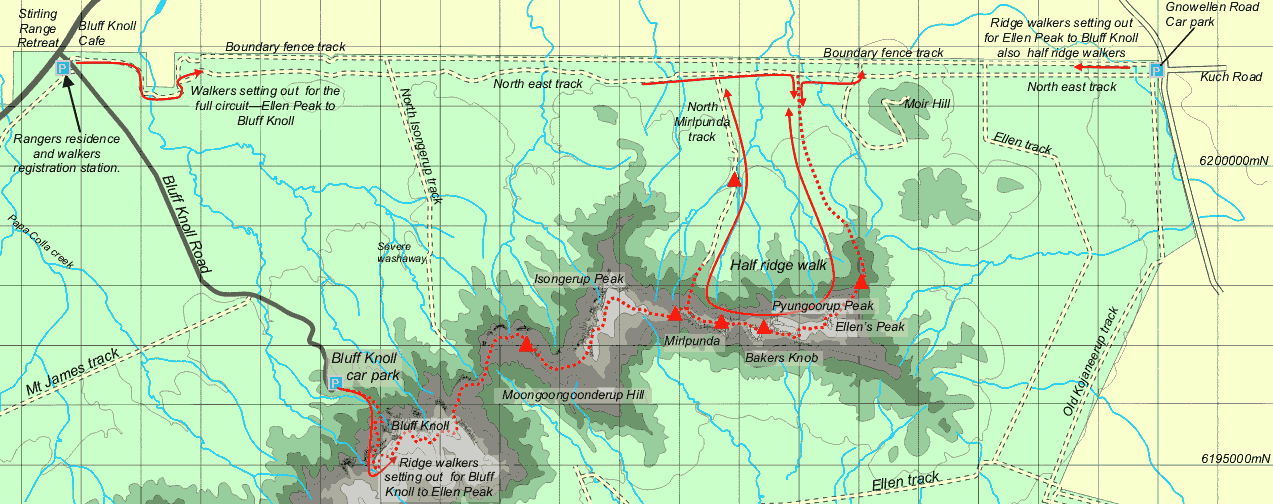
Day 1 : trailhead to She-oak col after Pyungoorup.
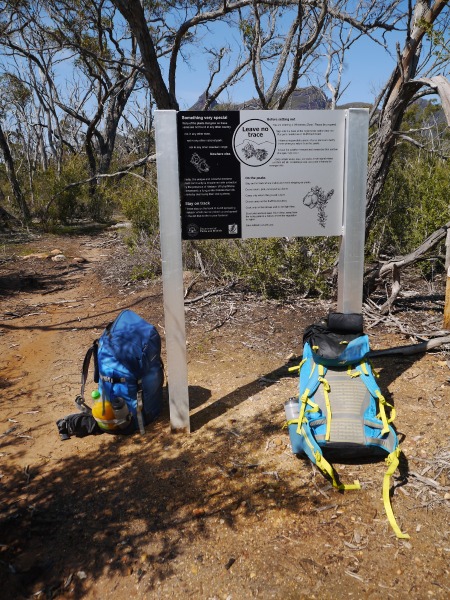
From the “leave no trace” sign follow the track in the bush, it is quite easy to follow. It crosses the fire break after 200 meters and goes on. After the first couple kms the track climbs a bit and then more steeply to the summit of a first hill at 598 meters. (3.5 km / 1 hr 30 minutes / +370m)
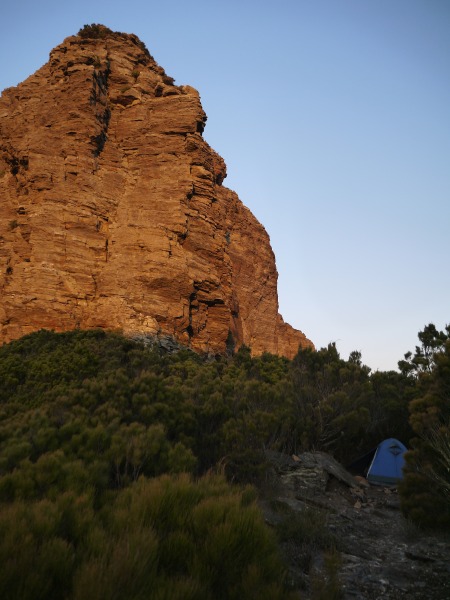
After this first summit you reach a first knoll, then saddle with good campsites, followed by a second knoll and another good saddle campsite. From there the track ascends steeper and steeper towards Ellen Peak. You will reach a small campsite (2 small tent sites) on the slope under the trees at 830 meters altitude. Just after that the track splits. Follow the track more to the left to climb Ellen Peak or the track to the right to bypass the summit by the north side (best if weather is bad). It is easy to get lost here and lose the track. Follow the rock slabs to the left until you reach a steep gully. You have to climb along this steep and narrow gully to reach a platform under the summit. From there you have to go around the summit by the right (north west) until you reach another gully which leads you to the top (elev. 1034 m). (1.5 km / 2 hrs. +430m)
Follow the same gully down to go down from the summit. A bit further you’ll join up with the bypass track. Follow the ridge, passing another saddle, up to a cairn next to a yellow marker with a faint blue arrow. From this point you can follow the track straight to the top of Pyungoorup Peak, but you will have to come back to this point after to take the track going to the left and bypassing the summit (because the west side of the peak is a cliff). After a short exposed section you will reach a nice overhang, locally called a camping cave, though it doesn’t offer any good shelter from the wind. After that it is hard as you have to make your way through thick sword grass. It’s hard to see your feet so be careful of the hidden stomps, rock and holes. And it’s best to wear gloves as this grass will cut your hands like paper, trust me. And it is quite slippery, with sometimes not so much trees to stop you from falling down the cliff. This will take you roughly 45 to 60 minutes, be careful. Try to stick close to the cliff base but be careful as false leads do exist. At the end you will ascend back up a bit to a nice sheltered sheoak saddle with 3 tent sites. 1.84 km / 2 hrs / -200 mtrs.
Day 2 : Bakers Knob / The Mirlpunda Arrows / Isongerup / Isongerup south / Moongoongoonderup / to Eucalyptus col
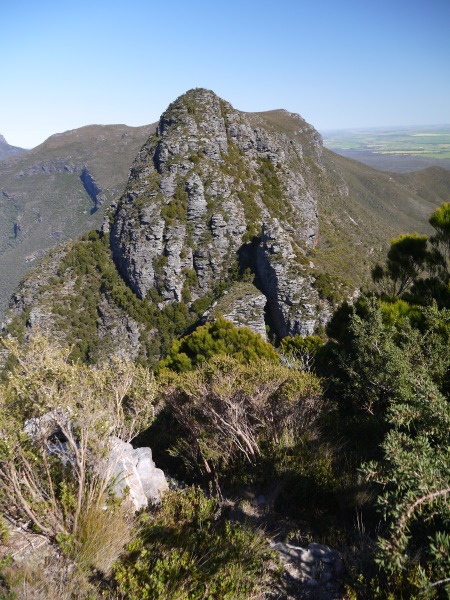
This day begins with the easy ascent of Bakers Knob. The descent is steep and involves some scrambling. Then comes the third arrow. This one is not too hard. Bypass the rock turret by going to the right and just after go back to the ridge (to the left) dismiss the trail going down to the right. Cross Little Arrow to the right along a rock terrace. Continue along the ridge and descend steeply on the track to the left of the east pinnacle, that is the most obvious route. You can go to the left in a steep gully but that leads only to the summit and it is a dead end. After going down east pinnacle either take left to the central gully (steep climb) or to the right, down to to the camping cave (requires some climbing) and join up with the track after the central gully. The track on the right is the easiest I think. At the intersection between the cave track and the central gully you can also continue to the west side of the arrow where a water barrel has been placed to collect water, but it has been reported leaking and might be empty or full with dead bats, so don’t rely on it. The track to access it is also really steep and slippery.
After the third arrow, going up and down the second arrow is easier.
The real difficulty comes with first arrow where finding the right route might require some trial and error. Climbing is easy but going down is not. Basically you have to follow the tracks going down to the right (north). After a steep descent along a rocky ledge you reach a small col, from here take right and go down a steep gully following a rock promontory. Keep to the side to the rock at the bottom and climb up again. Do not follow tracks going down too long as they are exit tracks leading to the North Mirlpunda fire track. After climbing up following the rock promontory you have to find another steep gully going down to the right of the mountain. You will have to be careful as some obvious tracks lead to dead ends, like the one leading to a rock face, just 5 meters above from where the right track leads you. Once you have reached the base of the cliff you just have to walk through the middle of the rock castle. This leads you to a camping area in a sheoak col. Expect the traverse of first arrow to take you around 1 to 2 hrs, even with a GPS it will be hard to know exactly where you are as one meter difference can make quite a difference. 2.5 km / 3 to 4 hrs / +200 m / -320m.
The rest of the day will seem like a holiday after the traverse of the arrows. It is even quite nice and enjoyable to climb Isongerup, then go down to its South Peak. Just don’t lose the track as finding it again in this thick vegetation is hard. After the south peak you reach a small saddle that could host 2 tents at most before bypassing the summit of Moongoongoonderup Hill, going down and then up a rocky peak and finally down to an eucalyptus sheltered campsite. 3.7 km / 2hr30 / +310m / -380m.
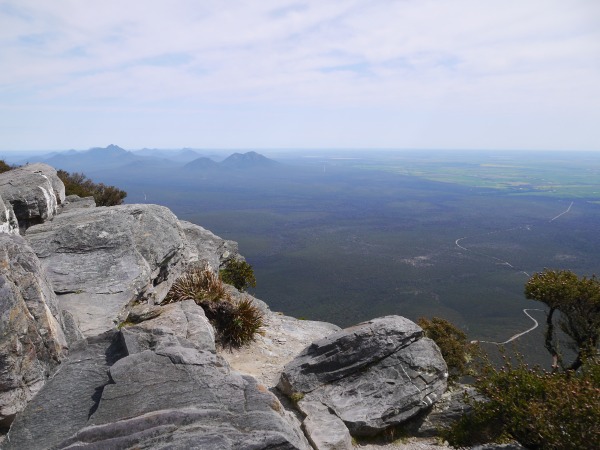
Day 3 : Bluff Knoll
This is the easiest day so far as you mainly have to follow the track without needing to worry too much about navigation as you follow the ridge up to the east peak of Bluff Knoll and then Bluff Knoll itself. The track is steep with 400 meters to climb in a km but once on the plateau it gets easier as the vegetation is smaller and sparser. After reaching the east peak next to a large natural cairn you climb down to a saddle, climb up and down again to the chasm and back up to the summit of Bluff Knoll. This is where you meet up with the marked trail to the carpark. 3.6 km / 3 hrs / -240m / +630m
After the summit you just have to follow the trail down. The track is large, well marked and maintained with lots of steps so take your time to ease the 650 meters descent and preserve your knees. 3.2 km / 1h30 / -650m.
If you get to the carpark early enough, hitching a ride down to the main road should be easy enough. If you have left a car here, good on you. If none of these options are available, you will have to walk 8 more km to the main road, good luck!
More resources
- The hike is described in John Chapman Lonely Planet book “Bushwalking in Australia” (1997), but it’s out of print. Try the libraries or buy the new-ish (2003) expensive edition. Alternatively, the ebook is available on the Open Library website in DAISY format, that can then be converted to EPUB for your ereader or phone.
- Torridon has published a book called “Mountain Walks in the Stirling Range - Part 2” but it is now sold out but they keep a nice page describing the hike with PDF files of a general map and two drawings on their website. Mush have!
- Ramon Fadli has a good account of the hike
- Summitpost also has a very good description
- Finally I have some notes from 1996 (PDF file) that I don’t even remember where or when I copied them but might still be useful!